Travelling with children can be quite a challenge for parents. You constantly have to keep an eye on them, tell them what they should and shouldn’t be doing, watch out for their safety and comfort and most important of all, keep them entertained through the journey. Children will be children and they will always be bursting with energy and wanting to do fun things all the time. And the moment you, as a parent, start to feel that you’ve become adept at handling them, they will ambush you with something that you never saw coming!
We say, let kids be kids and let them do their best at springing surprises at you. Who says that these surprises always have to be unpleasant ones? With a little planning and preparation, there is nothing that parents cannot handle. Modern day kids amaze their parents with their independent opinions and thoughts on almost everything they are exposed to. So how about teaming up with them to create their very own travelling kits? The idea is to involve them in the various aspects of travelling so that they value its nuances, and learn about being responsible instead of being difficult about it.
In this post, we will be letting you in on some basic ideas on how you can get your kids to participate in putting together the whole paraphernalia that would eventually become their very own travelling kit. Read on know more.
The Right Travel Kit
Thats correct, bags for children are different from those for adults. If you go to the luggage store, you will see cute little luggage bags for children with strollers attached so that kids can drag them around on their own. If your kids are sporty, they could also opt for a small backpack or rucksack. Remember, this bag is meant just for tickling your childrens imagination and teaching them about responsibility and independence. So keep it light and do not try to pack too many items into it.
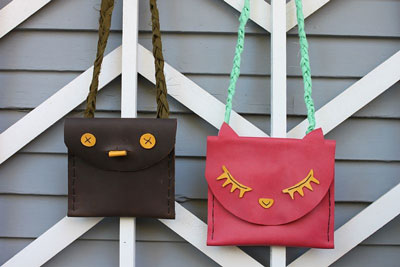
Alternatively, you can make a travel kit for your children at home. Theyre pretty easy to make and can be put together using common household items. This makes sense as you can customize the kits features to your children’s specific needs, tastes and personality. DIY kits/bags are also more affordable than readymade ones. Here are a couple of examples of easy DIY travel kits for children –
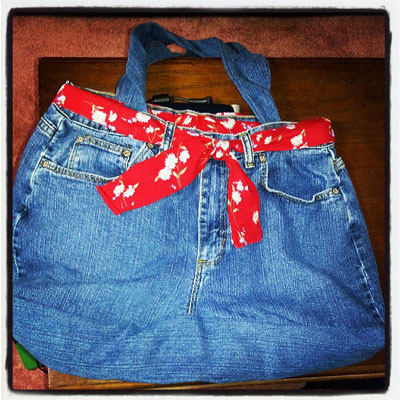
Making a travel kit for kids using an old pair of denim shorts
You will need “
- An old pair of denim shorts
- Long and strong lace/ribbons
- Scissors
- Needle and thread
- Fabric paint and paint brush
Making the kit “
- Simply cut the shorts to a desired size lengthwise. No need to cut them if theyre already the size that you want them to be.
- Stitch up the hem of the shorts, thereby creating two sections to store your stuff. Stitch up the zip in front of the shorts (if any) as well. Your old shorts are now a bag.
- Let the waist button remain as it is, as it can be sued to close the kit shut.
- To be able to carry this kit over your shoulder, attach the laces/ribbons on both the sides of the kit as handles. The pockets on the shorts can be used as sections to store/carry different items.
- Put your kids in charge of decorating the kit with fabric paint, laces and ribbons. They could also stick sequins and other embellishments on it. And voil , the travel kit is ready for use!
Making a travel pouch for kids using an old cushion cover
You will need “
- A cushion cover (small sized)
- Needle and thread
- Laces, fabric paint, glitter and ribbon bows for decoration
- Glue
Making the pouch –
- Decorate the cover by stitching lace on all sides.
- To create more sections you could stitch a couple of pieces of fabric outside on the cover.
- Ask your kids to use paint and glitter to decorate it further.
- Stick ribbon bows on to the cover to add a feminine touch for a little girls pouch.
- Use the cushion covers zip to open and shut the pouch. And the pouch is ready to be used!
Carry-on Contents for the Journey
Make sure that your childrens kit has enough sections to be able to carry a few games as per their interest that they can play along the journey. Besides these, they can also take along their story books, colouring books and crayons, notepad and stickers, and toys. There also needs to be enough space which can be allotted to dry snack items like granola bars, cookies, fruity chews, etc. to prevent leakages in their tiny bags.
The Packing Methodology
Take this opportunity to teach your kids the fine art of organising. Teach them how to pack their things without damaging them by placing the heaviest item of all at the bottom. Delicate items, if any, need to put into the bag at the end to prevent them from getting crushed under the heavy things.
Safety First
Teach your kids the importance of hygiene and safety by allotting a small section of the kit to their toiletries and common medicines. Besides a section for bathing soap, toothpaste and toothbrushes, there needs to be pockets for keeping medicinal creams/gels, band aids, antiseptic lotions and so on.
Kids like to feel independent and want to do as many things as possible on their own. A DIY travelling kit may be seemingly unimportant but such simple things go a long way in shaping their behaviour and personality. Besides that, this DIY project is a great way for you and your children to bond by spending some quality time together and working towards a common goal.
_______________________________________
Guest Post – Author Bio :
Shayna Smith has been working as a freelance writer for a long time. She has a diverse background in shopping, relationships and parenting. She loves sharing her opinions on the latest issues affecting women and is also an expert on deals direct coupons.


