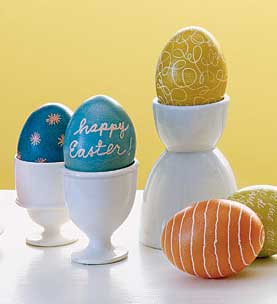
How to dye Easter Eggs
When I was young, we spent a day dyeing hard-boiled eggs bright colours, leaving a pile of the vivid orbs in a bowl to be eaten at any time. Wed stake out our favourite egg and on Easter Sunday brandish the tip towards an opposing egg, cracking the enemy’s tip with satisfaction. The last egg to crack was proclaimed the Easter champion and eaten with gusto!
Our eggs were always imperfect specimens, but Martha Stewart has some handy tips to ensure that your day of dyeing is successful. She even gives drying tips to avoid the dreaded blotches.

Martha Stewart Egg Dyeing 101
Steps:
- Protect your work area with paper towels or newspaper.
- Mix 1 teaspoon of vinegar and 20 drops of food colouring (use more to intensify colour) in 1 cup of hot water in a heatproof bowl, cup, or jar deep enough to let you submerge an egg completely.
- To create different tints of a colour, vary dipping times: Submerge eggs for less than 5 minutes for light colours, and leave the egg in for 10 minutes or more for deeper shades.
- Using tongs makes handling the eggs easy.
- To make a two-colour egg, dye the whole egg first in a light colour, let dry for 15 minutes, and then submerge half into a darker colour.
So gather the children and bring back a dying art. Its fun when you know how to avoid the pitfalls and if they fill up on real eggs, they may not want to eat so many chocolate ones!
Guest Post written by Karina Reyne, past co-partner of Handmade Emporium, the hip handmade online market.
Check out the best of handmade at Handmade Emporium


