Ever wonder how professional photographer tend to get such good results in quite low light? Yes they tend to have fancy cameras, but the most important piece of kit for low light photography is a tripod.
Not all of us can afford a fancy DSLR with a super duper lens, but if you haven’t used your camera on a manual setting now is the time, and a functional tripod can be picked up for $50-$100 and is really worth the investment.
This technique will work best for non moving objects, landscapes and interiors. Not great for portraits as even slight movement will appear blurry.
So I’ll preface this with: I’m not a professional photographer, everything I have learnt has been from trial and error but this is what works for me.
So the tricks are:
Steady camera (tripod)
Long exposure
Low Aperture value
High ISO speed
Read your camera manual
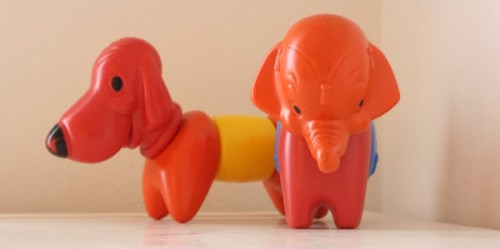
As an example I took this photo above in a very dark room, 7pm on a rainy night with minimal natural light and no artificial light. I have not edited this photo in any way apart from cropping for composition.
It had a 4 sec exposure which is very long, so to minimise the camera shake I had the camera down on the bench. A tripod is ideal for long exposure times.
The ISO speed was 1600 and the aperture value 7.1
I adjusted these values manually with an Aperture Value (Av) preference setting. This means I set the aperture and the camera decides the speed.
Even if you only have a basic point and shoot digital camera, have a read of your manual, most will allow for some sort of manual setting adjustment.
Ok, have I confused you with Av’s and ISOs and gobbledygook? Do yourself a favour and read this excellent explanation of how a camera works, I guarantee that it will never shoot on an auto setting ever again.
So now it’s time to have some fun playing with your camera…
This Guest Post is brought to you by Cintia over at My Poppet. She is a blogger, crafter and online store owner. Want more My Poppet? Read the blog or visit the online store.


