Another great tutorial in our guest post series, this time from the lovely Julie from MOOPs and Hoops.
Thank you Julie for your take on the ‘Handmade Bowl’.
I was looking through my old craft project books a few months ago and came across this handmade bowl section. Why not give it a go I thought¦..so here I am a few weeks later taking photos and writing a few notes on how to make one for yourselves.
I couldn’t find any paper that I really loved in time for Handmade Kids to post this but it should give you an idea of what you can achieve. All shapes and sizes can be done and I had a lot of fun making it. Because there are several layers, it is something you can do over a few nights and even something the kidletts can have a go at, especially over the school holidays. We sooooo need some projects to keep them occupied! It would be great to see everyones crafted bowls when they are finished¦.I just love seeing other peoples crafts- why not to our Handmade Kids facebook wall. Have Fun!
The key to this project is to take your time and simply build up the layers until you have a form that appears fragile, but is actually strong. Fill with dried flowers or rose petals or use for whatever purpose you like, whether display, storage or simple ornament. Just have some fun and get glue everywhere!!
Supplies you will need:
– Newspapers
– PVA glue
– Mixing bowl
– Clingwrap (glad wrap!)
– Glass or metal bowl the same shape & size you want your handmade bowl to be
– Med to large paintbrush
– Hand-made paper sheets that can tear apart (2 to 4 sheets depending on size of bowl)
Directions:
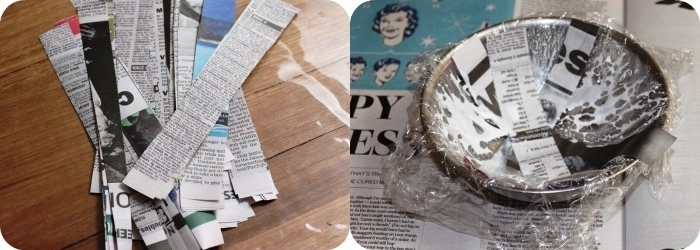
1. Cover your work area with plastic or newspapers. Mix up a small amount of PVA glue with some drops of water. (You want it still as a sticky glue but slightly watered down, dont make it too runny!) With the clingwrap, cover the entire bowl that you will use as a mould.
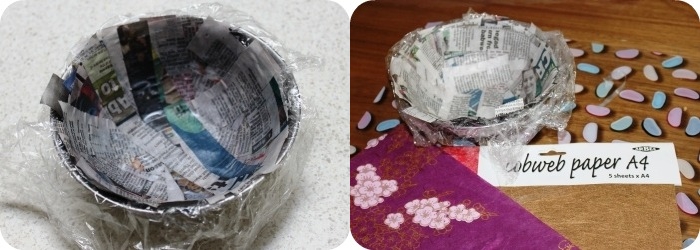
2. Cut the newspaper into strips approx 2cm wide x 6 cm long. Using the paint brush, paste the strips using the PVA glue into the clingwrap bowl. Overlapping rows on the inside of the bowl, smoothing down the strips as you go. You can make the edge of the bowl smooth by cutting edges later when dry or leaving rough to add another textured look.
3. Keep pasting layers inside the bowl, going in a different direction to the previous layer. Allow to dry in between layers. Continue until you have applied at least six layers, leaving each layer to dry individually. When the final layer is dry, carefully remove the paper bowl from the mould and remove the cling wrap.
4. Tear up the hand-made paper and using the PVA glue (watered slightly down), over the inside of the bowl first, then the outside of the bowl.
5. Set the bowl aside, so that the glue has time to dry completely before use. You can leave as is or also spray with a clear lacquer glaze (I use folk art clearcote extra think Glaze by Plaid. It gives a glossy finish that is non yellowing)
Notes:
The more layers you apply the stronger the bowl will be. If you make a large bowl, you will need to apply more layers so that it is strong enough to support its own weight.
Make a Handmade fabric Bowl


